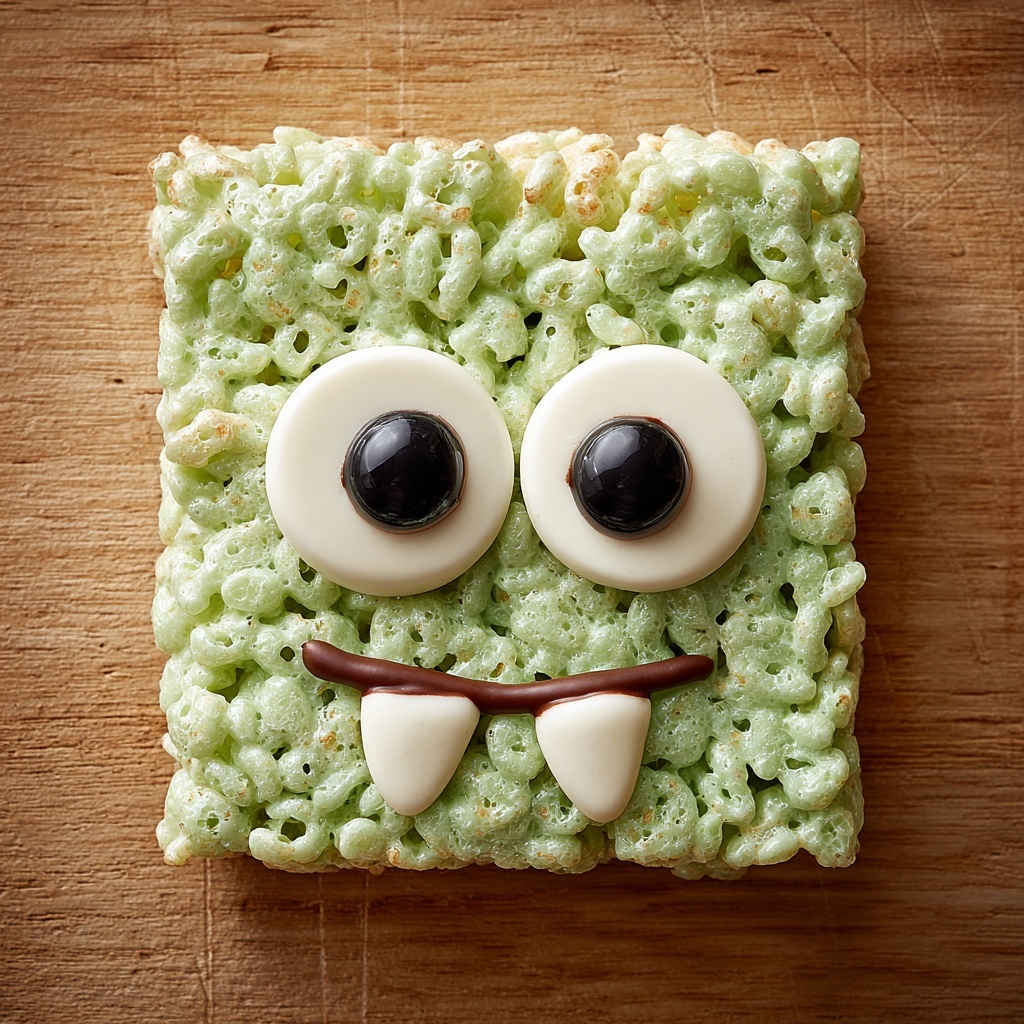
If you want to bring some seriously fun vibes to your dessert table, the Monster Rice Krispie Treats Recipe is exactly what you need. These vibrant, colorful treats take the classic Rice Krispie snack up several notches with playful hues, silly candy eyes, and optional drizzle that make every bite feel like a party. Easy to make, irresistibly chewy, and perfect for sharing, this recipe is a must-have for brightening up any gathering or just adding a little monster-fueled joy to your day.
Ingredients You’ll Need
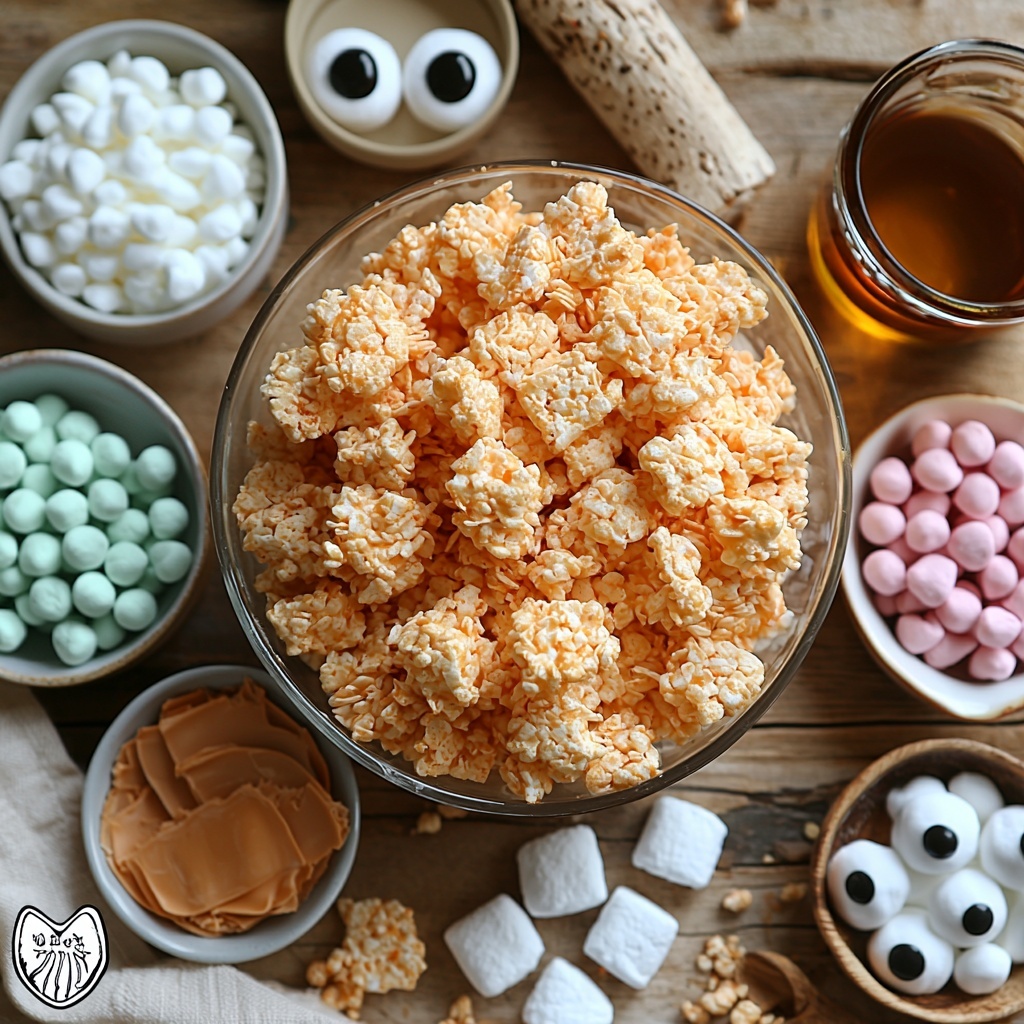
These ingredients are straightforward yet magical in transforming simple cereal and marshmallows into a festive treat. Each one plays a vital role: the Rice Krispies provide crispness, marshmallows bring chewy sweetness, and the colorful food coloring and candy eyes turn them into whimsical monsters you won’t want to stop eating.
- 6 cups Rice Krispies cereal: The crunchy base that gives these treats their classic texture and lightness.
- 1 package (10 ounces) mini marshmallows: The gooey glue that binds everything together with delicious sweetness.
- 3 tablespoons unsalted butter: Adds richness and helps melt the marshmallows smoothly.
- 1/2 teaspoon vanilla extract: Just a touch to deepen the flavor with a comforting warmth.
- Assorted food coloring (green, purple, orange, blue): Brings your monsters to life with eye-catching, vibrant colors.
- Candy eyes: The perfect fun finishing touch that makes every treat whimsical and ready for a smile.
- 1 cup white chocolate or candy melts (optional for drizzle): Adds a pretty, sweet drizzle to make your treats look extra special.
- Sprinkles (optional): For added texture and festive decoration to really amp up the fun factor.
How to Make Monster Rice Krispie Treats Recipe
Step 1: Prep the Pan and Melt Butter
First, prepare your 9×13-inch pan by greasing it with butter or a nonstick spray so your treats won’t stick later. Then, gently melt the unsalted butter in a large saucepan over low heat, which will set the foundation for that rich, creamy marshmallow mixture we’re aiming for.
Step 2: Melt the Marshmallows
Once the butter is melted, add all the mini marshmallows and stir continuously until they’ve dissolved completely into a smooth, shiny melt. Remove the pan from the heat, then stir in the vanilla extract. This adds a subtle sweetness and warmth that takes the flavor from basic to downright irresistible.
Step 3: Divide and Color the Mixture
Quickly divide the melted marshmallow mixture into separate bowls—one for each color you want to create. Use your assorted food coloring to tint each portion, stirring until you get bold, even colors. This step is super fun because it’s where these treats start turning into colorful monsters right before your eyes. Just be sure to work fast as the mixture begins to set quickly.
Step 4: Mix in the Rice Krispies
Into each colored bowl, fold in about 1 1/2 cups of Rice Krispies cereal at a time, stirring gently but thoroughly until every puff of cereal is coated in that marshmallow goodness. This balance keeps the treats crunchy and chewy all at once—a hallmark of the best Rice Krispie treats.
Step 5: Press into the Pan
Press each color section into a part of your prepared pan, creating distinct blocks of color side-by-side. Use a greased spatula or parchment paper to gently press down—this helps pack the mixture evenly without squashing those crispy bits. Let the treats cool and set for about 30 minutes.
Step 6: Cut and Decorate
After cooling, cut your colorful monster blocks into squares or rectangles. Now comes the fun part: decorate with candy eyes to give your monsters their quirky personalities. If you want to get fancy, drizzle melted white chocolate or candy melts over the top, then sprinkle on some fun sprinkles. These little extras turn your Monster Rice Krispie Treats Recipe into an unforgettable showstopper dessert.
How to Serve Monster Rice Krispie Treats Recipe
Garnishes
The candy eyes are a goofy and adorable garnish that instantly transform these treats into cute monsters ready for any party. Add the white chocolate drizzle to bring a touch of elegance and sweetness contrast, or toss on some festive sprinkles that add a pop of color and crunch.
Side Dishes
Serve these Monster Rice Krispie Treats with cold milk for a classic combo that’s hard to beat. They also pair wonderfully with fresh fruit or a light yogurt dip if you want to balance the sweetness with something fresh and tangy.
Creative Ways to Present
Slice the treats into monster faces and place on a bright-colored platter for a vibrant dessert table centerpiece. For kids’ parties, serve them in clear cups with a mini spoon for easy grabbing. You could also stack them like little monster towers or use cupcake liners to separate the colors for a neat, handheld presentation.
Make Ahead and Storage
Storing Leftovers
If you happen to have any leftover Monster Rice Krispie Treats Recipe pieces (though that rarely happens!), store them in an airtight container at room temperature. This keeps them soft and chewy for up to 3 days while preserving all the fun colors and tasty flavors.
Freezing
For longer storage, wrap leftover treats tightly in plastic wrap and place them in a freezer-safe bag or container. They can freeze well for up to a month. When you’re ready, just thaw at room temperature for about an hour and enjoy that fresh-baked feel.
Reheating
While these treats are typically served cool or at room temperature, if you’d like to soften them before serving, a quick 10-second zap in the microwave can bring back a little softness without melting the candy eyes or sprinkles. Just don’t overdo it!
FAQs
Can I use regular marshmallows instead of mini marshmallows?
Absolutely! Just chop regular-sized marshmallows into smaller pieces so they melt evenly and quickly. Mini marshmallows just melt faster and more smoothly if you can get them.
What if I don’t have food coloring? Can I still make the recipe?
You can definitely make the treats without food coloring; they’ll simply be the classic creamy white color instead of vibrant monsters. To keep the monster theme, focus on creative decoration using candy eyes or sprinkles.
Can I add mix-ins like chocolate chips or nuts?
Going for mix-ins is a fun twist! Just fold them in after mixing with the cereal so they get distributed evenly. Keep in mind that any additions might change the texture slightly, but it makes the treats even more interesting.
How do I prevent the treats from sticking to my hands when pressing them?
Greasing your hands with butter or spraying a little nonstick spray on them before you press the mixture really helps. You can also use a greased spatula or parchment paper to press down smoothly without the goo sticking.
What’s the best pan size if I want thicker treats?
Using a smaller pan than 9×13 inches will give you thicker, chunkier treats. Just keep the same amount of ingredients and press the mixture firmly so it sets well and holds together.
Final Thoughts
There’s something genuinely joyful about creating and sharing the Monster Rice Krispie Treats Recipe — it’s a simple yet spectacular way to bring color, fun, and deliciousness to life in the kitchen. Whether for a party, a holiday, or just a weekend treat, these treats never fail to make smiles appear. Give this recipe a try soon, and let those monster-sized happy vibes take over your snack time!
Print
Monster Rice Krispie Treats Recipe
- Prep Time: 15 minutes
- Cook Time: 5 minutes
- Total Time: 20 minutes
- Yield: 12–15 treats
- Category: Dessert, Snack
- Method: Stovetop
- Cuisine: American
- Diet: Vegetarian
Description
These Monster Rice Krispie Treats are a fun and colorful twist on the classic no-bake dessert, perfect for Halloween or any kids’ party. Made with crispy Rice Krispies cereal, melted marshmallows tinted with vibrant food coloring, and decorated with candy eyes and optional white chocolate drizzle, these treats are easy to make and delightfully festive.
Ingredients
Main Ingredients
- 6 cups Rice Krispies cereal
- 1 package (10 ounces) mini marshmallows
- 3 tablespoons unsalted butter
- 1/2 teaspoon vanilla extract
Decorations
- Assorted food coloring (green, purple, orange, blue)
- Candy eyes
- 1 cup white chocolate or candy melts (optional, for drizzle)
- Sprinkles (optional)
Instructions
- Prepare the Pan: Grease a 9×13-inch pan with butter or nonstick spray to ensure the treats don’t stick.
- Melt Butter and Marshmallows: In a large saucepan over low heat, melt the butter. Add the mini marshmallows and stir consistently until the mixture is completely melted and smooth.
- Add Vanilla: Remove the saucepan from heat and stir in the vanilla extract to flavor the marshmallow mixture.
- Divide and Color: Quickly divide the melted marshmallow mixture evenly into separate bowls and tint each portion with your chosen food coloring. Work fast to prevent the mixture from setting.
- Mix in Cereal: Stir 1 1/2 cups of Rice Krispies cereal into each colored marshmallow mixture bowl until the cereal is fully coated.
- Press into Pan: Press each colored mixture gently into separate sections of the prepared pan using a greased spatula or parchment paper, creating colorful layers or sections.
- Cool and Cut: Let the treats cool and set for about 30 minutes. Once cooled, cut into squares or rectangles.
- Decorate: Decorate with candy eyes, drizzle melted white chocolate or candy melts over the top if desired, and add sprinkles for extra fun and festive flair.
Notes
- Work quickly once the marshmallow mixture is tinted, as it sets fast and becomes difficult to mix and shape.
- For thicker treats, use a smaller pan to increase the depth of the layers.
- Store the treats in an airtight container at room temperature for up to 3 days to maintain freshness and texture.

